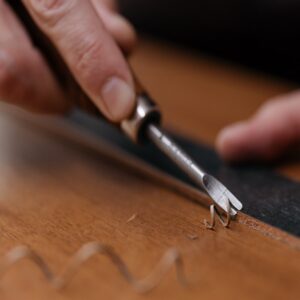
Wood carving is a great way to create beautiful and unique pieces of art. However, if you want your projects to have a shiny finish, you will need to burnish them. In this blog post, we will discuss the best ways to burnish your wood carving projects for a beautiful shine!
What Does It Mean To Burnish My Wood Projects?
Burnishing is the process of rubbing a hard, smooth object against the surface of your wood carving. This will create friction and heat, which will help to melt the top layer of wood and give it a shiny finish. The best objects to use for burnishing are metal or stone tools. You can also use a piece of sandpaper if you do not have any other objects on hand.
Why Should I Burnish My Wood Projects?
Burnishing your wood projects is a great way to protect them from dirt, dust, and other elements. It will also give them a beautiful shine that will make them stand out from the rest. In addition, burnishing will also help to preserve the wood and keep it looking new for years to come.
How Do I Burnish My Wood Projects?
There are a few different ways that you can burnish your wood projects.
Burnish With A Metal Tool
The first method is to use a metal tool, such as a hammer or chisel. Simply rub the tool against the surface of the wood in a circular motion. You will need to apply pressure to get the desired effect.
Sand It With A Sandpaper
Another way to burnish your wood projects is to use a piece of sandpaper. Rub the sandpaper against the surface of the wood in a back-and-forth motion. You will need to use higher grit sandpaper for this method.
Use A Stone
You can also use a stone to burnish your wood projects. Rub the stone against the surface of the wood in a circular motion. Apply pressure to get the desired effect.
Which Method Should I Use?
The method that you use to burnish your wood projects will depend on the type of wood that you are working with. If you are working with a softwood, such as pine, you should use the metal tool method. If you are working with a hardwood, such as oak, you should use the sandpaper method. You can also use the stone method on both softwoods and hardwoods.
How Do You Burnish Wood Edges?
If you want to burnish the edges of your wood projects, you will need to use a different method. First, you will need to round off the edges with a chisel or router. Once the edges are rounded, you can then use a sandpaper to burnish them.
How Often Should I Burnish My Wood Projects?
You should burnish your wood projects every few months to keep them looking their best.
By following these simple tips, you can easily burnish your wood carving projects for a beautiful shine! Try out different methods and see which one works best for you.
What Is The Purpose Of Brunishing My Wood?
The purpose of burnishing your wood is to create a shiny finish that will protect the wood and make it look new for years to come. Burnishing will also help to preserve the wood.
How To Properly Burnish My Wood?
You should burnish your wood every few months to keep it looking its best. You can use a metal tool, sandpaper, or stone to burnish your wood. Simply rub the object against the surface of the wood in a circular motion. Apply pressure to get the desired effect.
How Do You Burnish Wood By Hand?
You may polish wood by hand with a metal tool, sandpaper, or stone. Simply rub the object on the wood in a circular motion to obtain the desired result. To achieve the required effect, apply pressure.
How Do You Burnish Wood With A Power Tool?
There are a few ways that you can burnish wood with a power tool. You can use a handheld rotary tool, like a Dremel, or an electric sander. If you have access to a lathe, you can also use that to burnish your wood. The best way to burnish your wood is with a power tool that has a rotating head, like a Dremel. This will allow you to get into all of the nooks and crannies of your carving.
Use a Fine Grit Sandpaper
When you are using a power tool to burnish your wood, you want to make sure that you are using a very fine grit sandpaper. You don’t want to sand too deeply and damage the wood. Just a light sanding is all that you need. You also want to make sure that you are moving the power tool in small, circular motions. This will help to create a smooth, even finish.
Move To Hand Sanding If Needed
Once you have finished burnishing your wood with a power tool, you can then move on to hand sanding. This is where you will want to use a very fine grit sandpaper. You don’t want to damage the wood, so just a light sanding is all that you need. Again, you want to make sure that you are moving in small, circular motions. This will create a smooth, even finish.
What To Do After I Finish With Sanding My Wood?
After you have finished sanding, you can then move on to polishing your wood. You want to use a very soft cloth for this step. A microfiber cloth works well. You don’t want to use anything that is too abrasive, as it could damage the wood. Just a light polishing is all that you need.
Applying A Finish
Once you have finished polishing your wood, you can then move on to applying a finish. This is where you will want to use a clear coat of polyurethane or lacquer. This will help to protect your wood and give it a shiny, smooth finish.
How Do I Keep My Wood Projects Shining Like A Diamond?
The best way to keep your wood projects shining like new is to regularly burnish them. Burnishing is the process of rubbing the surface of the wood with a hard, smooth object to create friction and heat. This friction and heat help to polish the wood and bring out its natural shine.
Follow the tips above and your wood projects will thank you for staying shiny and looking great for years to come!
Some Tips For Burnishing Wood
- Use a metal tool, sandpaper, or stone to burnish your wood. Simply rub the object against the surface of the wood in a circular motion.
- Apply pressure to get the desired effect.
- You should burnish your wood every few months to keep it looking its best.
- Use very fine grit sandpaper when using a power tool to avoid damaging the wood.
- Move in small, circular motions when sanding to create a smooth, even finish.
- Use a soft cloth to polish the wood after sanding.
- Apply a clear coat of polyurethane or lacquer to protect your wood and give it a shiny, smooth finish.
Conclusion
Burnishing your wood is a great way to keep it looking its best. We all want our masterpiece to look shiny and new for years to come. It’s easy to do and only takes a few minutes. Just remember to use very fine grit sandpaper, move in small, circular motions, and apply a clear coat of polyurethane or lacquer when you’re finished. Your wood will thank you for it!


