Carving a logo on wood is a great way to add a personal touch to your business or brand. It can also be a fun and creative way to show off your skills. If you’re thinking about carving a logo on wood, there are a few things you should keep in mind. In this article, we’ll give you some tips on how to carve a logo on wood.
Which Tools Do I Need To Carve a Logo On Wood?
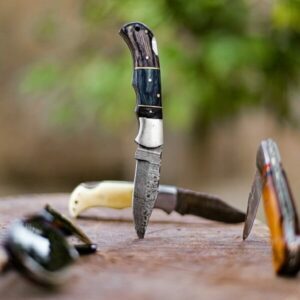
To carve your logo into wood, you’ll need a few tools. First, you’ll need a sharp knife. A utility knife or X-acto knife will work fine. You’ll also need a straightedge or template to help you keep your lines straight. And finally, you’ll need a wood carving tool. A Dremel is ideal, but you can also use a chisel or gouge.
Which Wood Is The Best To Carve On A Logo?
The best wood to carve on a logo will depend on the size and shape of your logo. If you’re just starting out, we recommend using softwood like balsa or poplar. These woods are easier to carve and will give you a chance to practice your technique before moving on to harder woods.
Which Technique Should I Use To Carve A Logo On Wood?
There are a few different techniques you can use to carve your logo into wood. The most common is to use a Dremel with a carving bit. You can also use a chisel or gouge, but this will require more time and effort. If you’re using a Dremel, we recommend starting with a small bit and working your way up to a larger one. This will give you more control and help you avoid making mistakes.
A carving knife is another option for carving your logo into wood. You can use a utility knife or X-acto knife to carve simple designs or letters. Make sure your knife is sharp and use a straightedge to guide your cuts.
This method is best suited for small logos or those with simple designs.
Once you’ve chosen your technique, it’s time to start carving! Follow the outline of your design and be sure to keep your lines straight
Trace Your Logo On The Wood With A Pencil
Once you have your tools, and you’ve decided on the best carving technique for your project, it’s time to start tracing your logo onto the wood. Use a pencil to lightly trace the outline of your design onto the wood. If you’re using a Dremel, you can use a template to help you keep your lines straight. Make sure the lines are clear and easy to see.
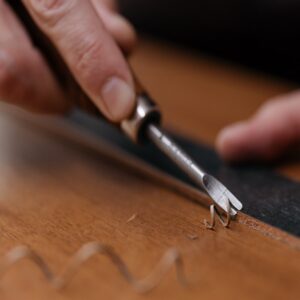
Start Carving Along The Lines
Once you’ve cut along all of the lines, it’s time to start carving! Using your chosen carving tool, begin slowly scraping away the wood inside the lines. Be careful not to carve too deeply – you don’t want to go all the way through the wood. Just take your time and go slowly until you’ve carved away all of the excess wood.
Sand The Edges
Once you’re happy with your carving, it’s time to sand the edges. This will help smooth out any rough spots and give your logo a nice, finished look. First, use coarse-grit sandpaper to remove any major imperfections. Then, switch to finer-grit sandpaper and continue until the edges are smooth.
Finish Up
Once you’re finished carving and sanding, your logo is complete! You can now apply a finish to the wood if you like. This will help protect your carving and give it a nice shine. If you’re using a Dremel, we recommend applying a clear coat of lacquer or polyurethane. Just apply a thin layer with a brush or rag and allow it to dry. You can also stain the wood if you prefer. Just be sure to test the stain on a small area first to make sure it’s the color you want.
What To Do If The Wood Starts To Splinter?
As you’re carving, you may find that the wood starts to splinter. This is perfectly normal! Just take your time and go slowly. If the wood does start to splinter, you can always sand it down later. If you want to prevent the wood from splintering, you can use a wood carving knife with a rounded tip.
How Do You Emboss A Logo On Wood?
If you want to add a bit of dimension to your carved logo, you can emboss it. To do this, you’ll need a few tools: a ball-peen hammer, a piece of carbon paper, and a small chisel.
Begin by tracing your logo onto the wood with the carbon paper. Then, using the ball-peen hammer, gently tap around the outline of your logo. Be careful not to hit too hard – you don’t want to damage the wood.
Once you’ve gone all the way around the outline, remove the carbon paper. You should now see a faint impression of your logo in the wood.
Next, use the chisel to carve around the outline of your logo. Be sure to go slowly and carefully so you don’t damage the wood.
Once you’ve finished carving, sand the edges smoothly. Then, apply a sealant or stain if desired. Your embossed logo is now complete!
How To Paint My Logo After It’s Carved On Wood?
If you want to add color to your carved logo, painting is a great option. To get started, you’ll need a few supplies: primer, paint, and brushes.
First, prime the area around your logo. This will help the paint adhere better and prevent it from chipping. Once the primer is dry, apply a thin layer of paint. Be sure to use even strokes and go slowly so you don’t get any paint on the wood outside of your logo.
Once the first coat of paint is dry, apply a second coat. Again, be sure to use even strokes and go slowly to avoid any accidents. Once the second coat is dry, your painted logo is complete!
Final Thoughts
Now that you know how to carve a logo on wood, it’s time to get started! Just remember to take your time and go slowly. With a little practice, you’ll be able to create professional-looking logos in no time.
If you’re looking for more information on wood carving, be sure to check out our other articles. We cover everything from beginner tips to advanced techniques. Happy carving!