If you are a woodworker, then you know the importance of having a good workbench. A quality workbench can make all the difference in the world when it comes to your productivity and results. In this blog post, we will show you how to build a wood carving workbench from scratch. This bench is specifically designed for woodcarving, but it can be used for other tasks as well. It is sturdy and durable, and it will last for years to come!
The Materials Need For Wood Carving Workbench
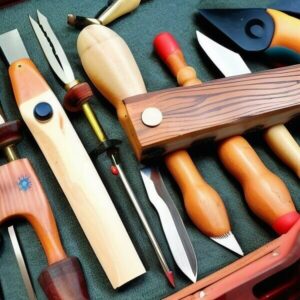
Building a workbench from scratch may seem like a daunting task, but we promise it is not as difficult as it seems. With our step-by-step instructions, you will have your bench built in no time. The first thing you need to do is gather all of the materials and tools that you will need. We have listed everything you need below.
- Tablesaw
- Miter saw
- Drill
- Jigsaw
- Hammer
- Nail Gun
- Square
- Level
- Chisels
- Saw Horses
- Wood Glue
Now that you have all of your materials, it is time to get started!
Which Wood Should I Use When Carving a Workbench?
The type of wood you use for your workbench is important. You want to use hardwood because it will be more durable and last longer. Some good options include maple, oak, or cherry. If you are on a budget, then you can also use pine. Just keep in mind that pine is not as strong as hardwoods, so it may not last as long.
Prepare a Sketch For Accurate Work
Once you have chosen your wood, the next step is to prepare a sketch of your workbench. This will help you make sure that all of your pieces are in the correct size and shape. It is also important to make sure that your sketches are accurate so that your bench turns out exactly how you want it.
Use a Miter Saw To Cut The Pieces
After your sketch is complete, it is time to start cutting the pieces for your workbench. You will need to use a miter saw for this task. If you do not have a miter saw, you can also use a circular saw. Just make sure that the blade is set at 90 degrees before you start cutting.
When you are cutting the pieces, it is important to make sure that they are all exactly the same size. This will ensure that your bench is level and stable.
Creating the Top of the Wood Carving Workbench
The top of your workbench is where you will do most of your wood carving, so it is important to make sure that it is smooth and level. You can use a hand plane to create a smooth surface. If you do not have a hand plane, you can also use sandpaper. Just make sure that you sand in the direction of the grain.
Assemble The Pieces With Wood Glue & Nails
Once all of the pieces are cut, it is time to start assembling them. You will want to use wood glue and nails for this task. Start by applying a generous amount of glue to one of the pieces. Then, fit the other piece into place and nail it in. Repeat this process until all of the pieces are assembled.
Allow The Glue To Dry & Finish The Bench
Use clamps to hold the pieces together while the glue dries. This will usually take about 24 hours. Once the glue is dry, you can remove the clamps and finish your bench. You may want to sand it down again or add a stain or sealant.
after the glue has dried, you can start finishing your bench. If you want, you can stain or paint the wood. You can also add a clear coat to protect it from moisture and wear. Once the finish is dry, your bench is ready to use!
Adding Drawers For Storage
Once your workbench is assembled, you may want to add drawers for storage. This is a great way to keep all of your carving tools and materials organized and within reach. To add drawers, simply cut them to size and then attach them to the frame using wood screws.
Fixes And Adjustments (If Needed)
Building a workbench is not an exact science, so there may be some adjustments that need to be made once you have assembled it. If any of the pieces are not level or the bench is unstable, simply disassemble it and make the necessary changes. Then, reassemble it and enjoy your new workbench!
Common Adjustments:
If the workbench is too unstable, you can add braces to the underside of the top.
You may also want to add a vise to one side of the bench for holding your workpiece while you carve it.
A drawer stop can be added to keep the drawers from falling out when they are opened.
You can also add a shelf to the bottom of the workbench for storing larger pieces of wood.
How To Use a Woodcarving Workbench?
Building a wood carving workbench from scratch may seem like a daunting task, but with the right tools and a little bit of patience, it can be surprisingly easy! Here are a few tips on how to use your new workbench:
- Start by clamping your piece of wood to the bench. This will help to keep it steady as you work.
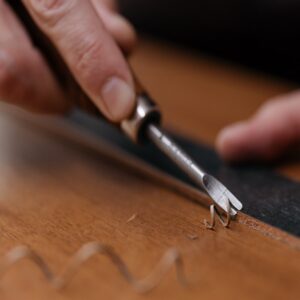
- Next, use a sharp knife or chisel to start carving away at the wood. Remember to go slowly and carefully at first, until you get a feel for how the tool cuts.
- As you carve, you may want to move the wood around to get a better angle. Once you’re happy with your carving, unclamp the wood and admire your handiwork.
- Make sure your bench is sturdy and stable before you start carving. The last thing you want is for your workbench to collapse while you’re working!
- If you’re new to wood carving, it’s a good idea to practice on some scrap wood first. That way, if you make any mistakes, it won’t matter as much.
How Woodcarving Workbench Can Improve My Work?
A wood carving workbench can make your carving projects much easier and more enjoyable. With a sturdy bench, you won’t have to worry about your workpiece moving around while you carve, and you’ll be able to get a better angle on your cuts. You can also add drawers or shelves to your bench for storing tools and materials.
A workbench will help you keep your tools and materials organized, and it will make it easier to find what you need when you’re ready to start working. Plus, it’s always satisfying to use a piece of furniture that you built yourself!
Final Thoughts
Building a wood carving workbench from scratch can be a fun and rewarding project. I’m sure it’ll improve your wood carving skills, It’ll let you practice easily and safely. And it’s also a great way to show off your handiwork to anyone who visits your workshop!
I know it takes time and effort to build something like this from scratch. But trust me, It’s worth it! So go ahead and give it a try. I’m sure you’ll be happy with the results.