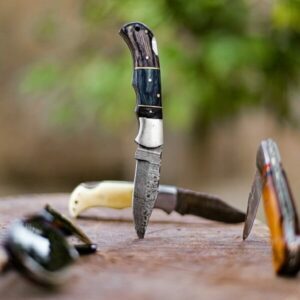
There are many different types of oil that can be used for wood carving finishing. Some work better than others, depending on the type of wood you are using and the look you are trying to achieve. In this blog post, we will explore the different types of oil and discuss which ones work best for various applications.
The Types Of Finishing Oil For Wood
There are several types of finishing oil that can be used on wood carving projects. The most common is linseed oil, tung oil, mineral oil, and Danish oil. Each has its own advantages and disadvantages that will be discussed in more detail below.
Linseed Oil
Linseed oil is derived from flax seeds and has been used as a wood finish for centuries. It is one of the most popular finishes for wood carving because it is easy to apply and provides a nice, natural sheen. Linseed oil does have some drawbacks, however. It can be quite sticky and attract dust, so it is important to apply it in a well-ventilated area. In addition, linseed oil can take several days to fully cure.
Boiled Linseed Oil
Boiled linseed oil is a type of linseed oil that has been heated to remove impurities. This makes it less likely to attract dust and speeds up the drying time. Boiled linseed oil is also more resistant to water and can be used as a protective finish on outdoor projects.
Tung Oil
Tung oil is another type of finishing oil that is made from the nuts of the tung tree. It is a popular choice for woodworking projects because it dries quickly and provides a hard, durable finish. Tung oil also has the advantage of being water-resistant, making it a good choice for projects that will be exposed to moisture. However, tung oil can be difficult to apply evenly, so be sure to practice on a scrap piece of wood before using it on your project.
Mineral Oil
Mineral oil is a clear, odorless oil that is derived from petroleum. It is a popular choice for woodworking projects because it is inexpensive and easy to apply. Mineral oil does have some drawbacks, however. It can be difficult to remove if you change your mind about the finish, and it will need to be reapplied regularly to maintain its water resistance.
Danish Oil
Danish oil is a type of finishing oil that is made from a blend of linseed oil and mineral oil. It is a popular choice for woodworking projects because it dries quickly, provides a hard, durable finish, and is easy to apply. However, there are some disadvantages associated with this type of oil. If you decide against the finish, it may be tough to get rid of, and it will need to be reapplied on a regular basis to maintain its waterproofing.
Walnut Oil
Walnut oil is a type of finishing oil that is made from the nuts of the walnut tree. It is a popular choice for woodworking projects because it provides a rich, natural color to the wood. However, walnut oil can be difficult to apply evenly and can take several days to fully cure.
Teak Oil
Teak oil is a great option for finishing wood carvings. It is a natural oil that penetrates deep into the grain of the wood, providing long-lasting protection against water damage and rot. Teak oil also gives the wood a beautiful lustrous finish. Teak oil is also very easy to apply, and it can be found at most hardware stores.
Which Oil Is The Best For Wood Carving Finishing?
The best oil for wood carving finishing will depend on the type of wood you are using and the look you are trying to achieve. If you are looking for a quick and easy finish, mineral oil is a good choice. If you want a durable and water-resistant finish, tung oil is a good option.
Danish oil is a good choice if you are looking for an easy-to-apply finish that dries quickly and provides a hard, durable finish. Walnut oil is a good option if you want to add rich, natural color to the wood. Teak oil is a great choice if you are looking for long-lasting protection against water damage and rot For a rich, natural color.
What Are The Disadvantages Of Using Oil?
While oil finishes have many advantages, they do have some drawbacks. One of the biggest disadvantages of oil is that it can be quite sticky and attract dust. Another drawback is that linseed oil can take several days or even weeks to fully cure.
How To Avoid From Dust Sticking To The Oil?
There are a few things you can do to avoid dust from sticking to the oil. One is to apply the oil in a well-ventilated area. Another is to apply several thin coats of oil rather than one thick coat. Finally, you can add a drop or two of essential oil to your finish to help repel dust.
How Long Does It Take For The Oil To Dry?
The drying time for oil finishes can vary greatly depending on the type of oil used, the temperature and humidity of your work environment, and how thickly the oil was applied. Some oils, like tung oil, can take several days or even weeks to fully cure. Others, like boiled linseed oil or Danish oil, will be dry to the touch in just a few hours. we recommend that you allow the finish to cure for at least 24 hours before using your project.
How Many Layers Of Oil Finish Do I Need For My Project?
This will depend on the size of your project and how much oil the wood is able to absorb. A good rule of thumb is to start with one quart for every three square feet of surface area. You can always apply more if needed, but you don’t want to waste oil by applying too much.
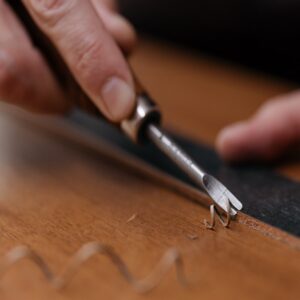
How To Apply Oil Finish On Wood?
There are several ways to apply oil finishes on wood. You can use a natural bristle brush, a lint-free cloth, or even your bare hands. The important thing is to work the oil into the grain of the wood and wipe away any excess.
Depending on the type of oil you’re using, you may need to apply several coats. Tung oil, for example, typically requires three to five coats. Each coat should be allowed to dry completely before applying the next.
Some people like to apply a thin coat of oil every day for the first week or so until the wood has had a chance to absorb as much oil as it can. Others prefer to apply several thicker coats all at once. Experiment and see what works best for you.
Can I Use Olive Oil On Wood Carving?
Yes, you can use olive oil on wood carving. However, it is not the best option for finishing wood. Olive oil will not penetrate as deeply into the grain of the wood and will not provide as much protection against water damage and rot.
Should I Let The Oil To Dry Before Sanding?
Yes, you should let the oil dry before sanding. Otherwise, the oil will just clog up your sandpaper and make it difficult to get a smooth finish.
Summary
Many different types of oil can be used for finishing wood carvings. The best oil to use will depend on the type of wood being carved and the desired finish. Some oils take longer to dry than others, and some are more difficult to apply. Experiment and see what works best for you.
There are many advantages to using oil finishes on woodcarvings. Oil finishes can be quick and easy to apply, and they provide a durable finish. However, oil finishes can be sticky and attract dust, so it is important to take precautions when applying them.
Allow the finish to dry completely before using your project. Apply several thin coats rather than one thick coat. Add a drop or two of essential oil to your finish to help repel dust. Experiment and see what works best for you.